


Implantation of presbyopia-correcting corneal inlays such as the Kamra (CorneaGen) is an excellent way to manage near vision in presbyopic patients. Use of the femtosecond laser to create a stromal pocket helps to ensure consistency and dependability in placement of the Kamra as well as proper placement over the first Purkinje image. This, in turn, provides improved accuracy of implantation depth and inlay centration.1,2 A major advantage of the pocket technique is the preservation of peripheral corneal nerves.
Unfortunately, results with the inlay are not always perfect, and decentration and other complications can occur, leading to dissatisfaction for both patients and doctors.3 Among the reasons for dissatisfaction that we have experienced are (1) frequent variation of refractive power associated with topographic changes of the anterior corneal surface and (2) visual symptoms such as glare, diplopia, scattering of light, and reduced vision.
We have found that the first symptom is depth-related. Deep insertion of the inlay (250–300 µm) will result in the least topographic changes. This is why stromal pocket formation should be performed at a late stage in the procedure, after any excimer laser tissue ablation is already done and just before the insertion of the Kamra inlay. The visual symptoms we believe to be related to decentration of the corneal inlay. Centration of the Kamra is crucial; a decentration as small as 0.25 mm can be a disaster for the patient.
IMPROVING ACCURACY
Three techniques can help to ensure proper centration of these inlays.
Technique No. 1: Internal fixation by memorizing the exact location of the visual axis (first Purkinje image) and placing the inlay on top of it. As a practical matter, this is almost impossible. Once the inlay and its holding forceps are in the stromal pocket, the air bubbles that form prevent any further viewing (Figure 1).
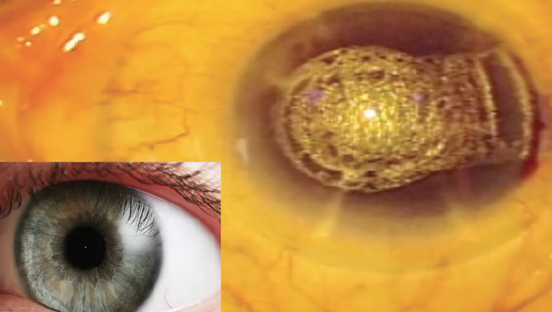
Figure 1. Air bubbles prevent accurate centration of the inlay.
Technique No. 2: External fixation based on a 4-mm corneal marker centered on the visual axis (Figure 2). This technique is not affected by air bubbles in the pocket. However, it still may not be accurate in the case of a patient with a large angle kappa and due to loss of visual parallax between the surgeon’s right and left eyes.
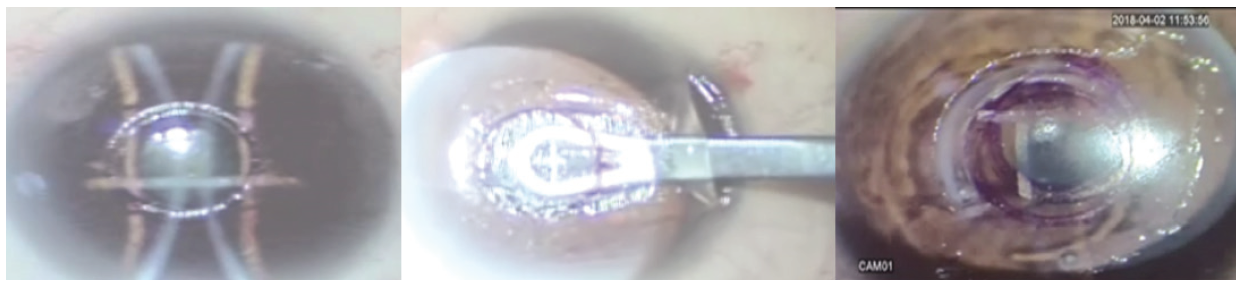
Figure 2. A 4-mm corneal marker is used to mark the visual axis (left), and the inlay is centered based on the external mark (center). Despite the marking, the inlay ends up decentered (right).
Technique No. 3: External fixation based on a phototherapeutic keratectomy (PTK) circle 3.8 mm in diameter and 20 to 30 µm in depth, centered exactly over the visual axis (Figure 3). With the PTK mark in place, we know that we have a circle centered exactly over the visual axis, and the inlay can be placed within that circular PTK mark.
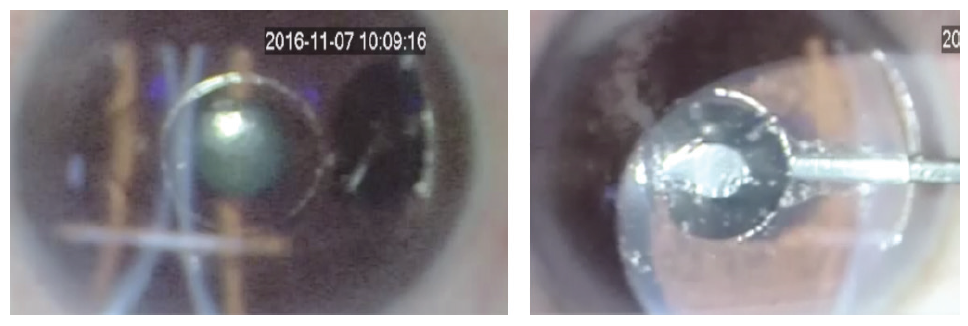
Figure 3. A PTK 3.8 mm in diameter and 20 to 30 μm in depth is made exactly over the visual axis (left); this allows the implant to be centered under the PTK (right).
CENTERING THE CIRCLE
Some excimer lasers are by default centered on the pupil and not the visual axis. If this is the case, there are two options to center the laser treatment.
Option No. 1: Shift treatment to the visual axis. This can be done using settings on the machine (Figure 4).

Figure 4. If the excimer laser defaults to centering over the cornea, the settings on the laser can be changed to center on the visual axis.
Option No. 2: If the machine has no such setting and the PTK mark is on the center of the pupil and not on the visual axis, use the following multistep process.
- Put the inlay in the displaced circle mark;
- Take the patient to a machine that can photograph the cornea (eg, OPD-Scan III, Nidek; HD Analyzer, CorneaGen; Figure 5) to show how far the corneal inlay is away from its intended position; and
- Take the patient immediately to the microscope and shift the inlay as needed, using the PTK circular mark as your reference (Figure 6).
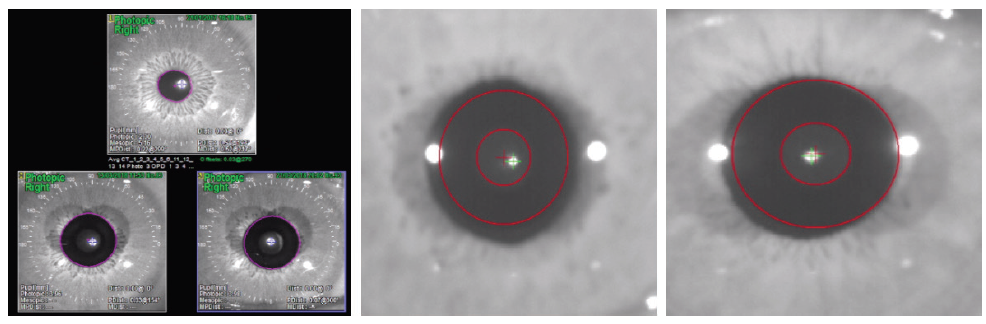
Figure 5. An OPD-Scan III image (left) and HD Analyzer images (center and right) show placement of the inlay.
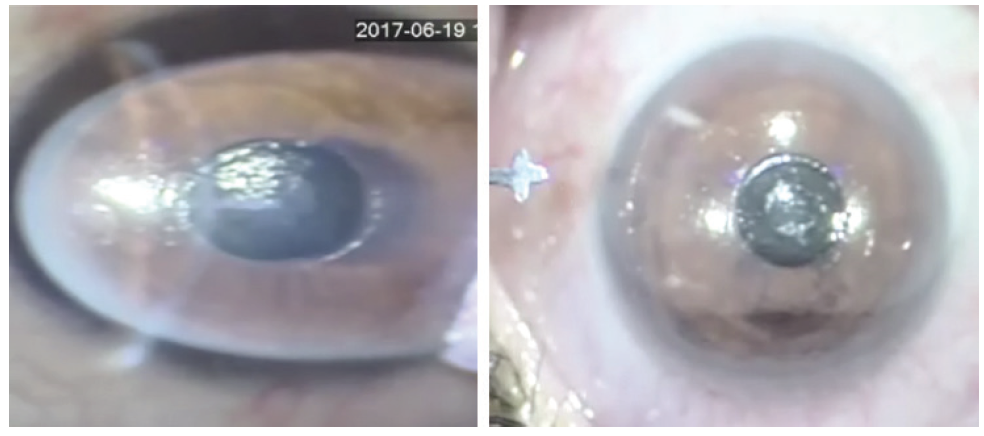
Figure 6. The decentered inlay (left) is moved to the correct position (right).
CONCLUSION
Using the three techniques outlined here to improve accurate placement of the inlay and the two options to center the laser treatment should help to decrease patient dissatisfaction resulting from variation of refractive power and visual side effects.
1. Papadopoulos PA, Papadopoulos AP. Current management of presbyopia. Middle East Afr J Ophthalmol. 2014;21(1):10-17.
2. Binder P. New femtosecond laser software technology to create intrastromal pockets for corneal inlays. Invest Ophthalmol Vis Sci. 2010;51:2868.
3. Kamra Inlay Professional Use Information. US Food and Drug Administration. https://www.accessdata.fda.gov/cdrh_docs/pdf12/p120023d.pdf, Accessed October 10, 2018.
